Harvest planning
Plan what goes in each delivery's box, and let Copia work out how much to harvest for every size.
Harvest Planning is where you decide what goes in the box for each delivery date. You enter how much goes in a full share, and Copia works out the quantities for every size and the total you need to harvest.
The delivery list
Go to Copia → Harvest Planning. You’ll see every upcoming delivery date with its season, number of active members, and whether the box has been planned yet.
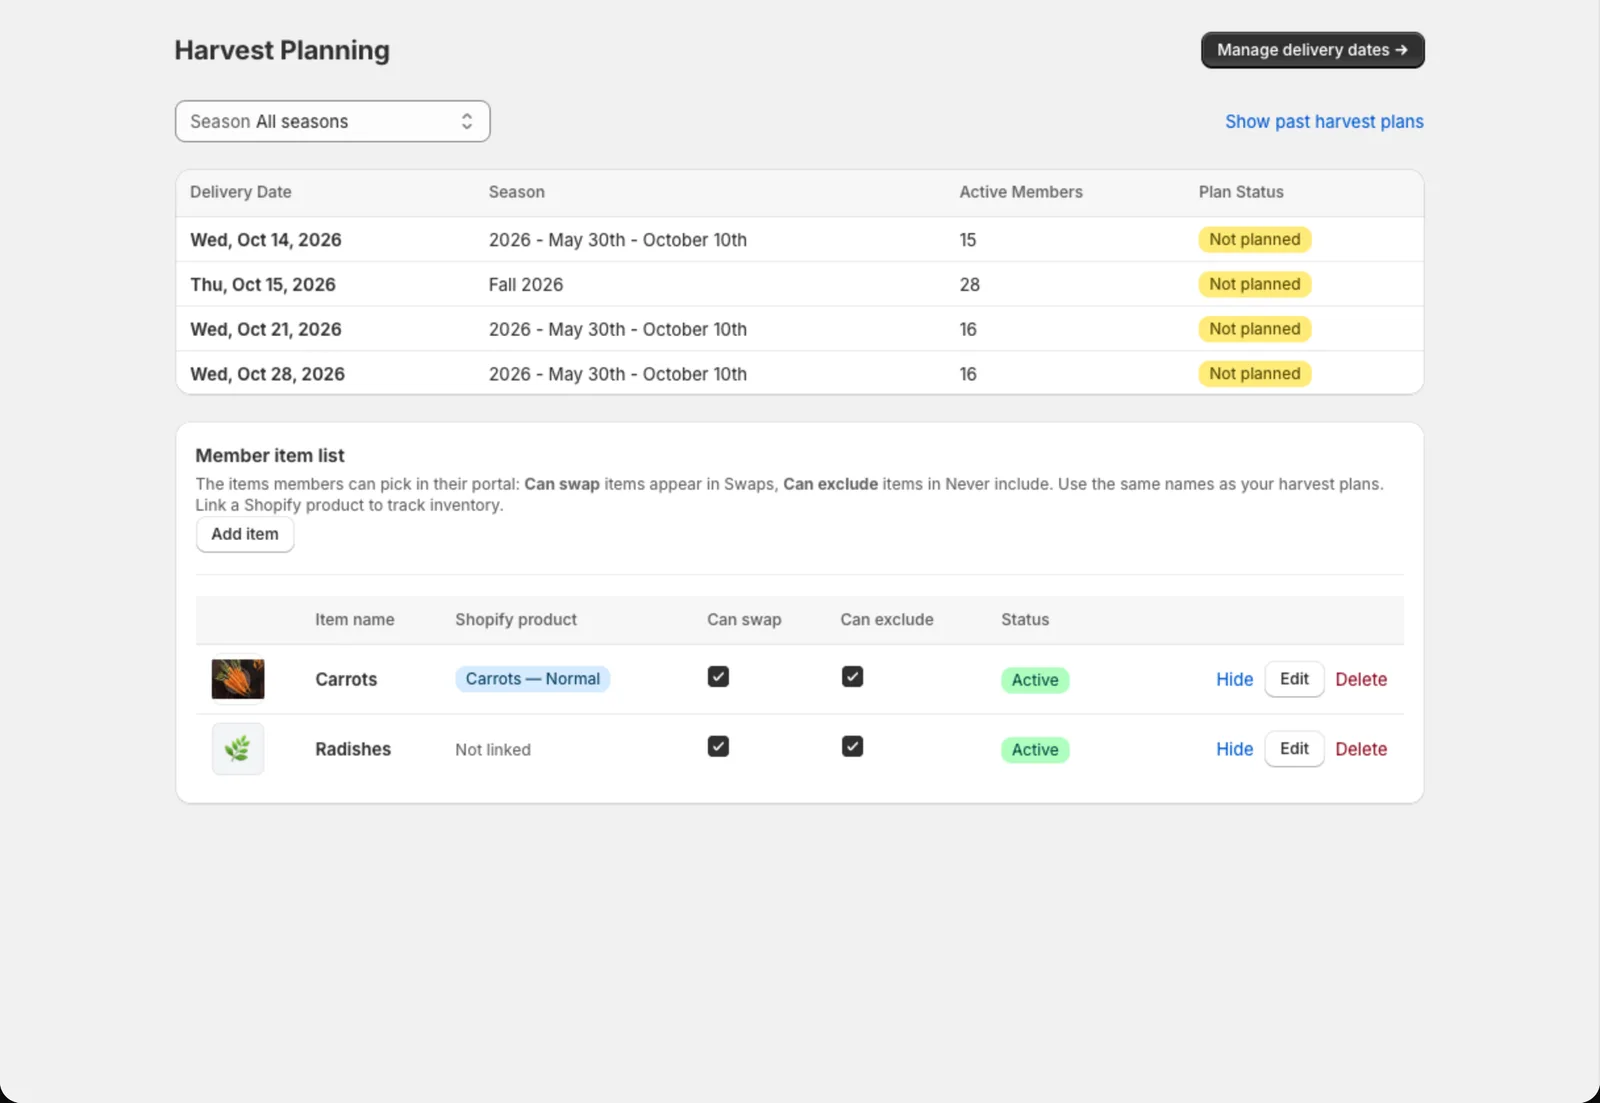
Click a date to plan it.
Plan a delivery
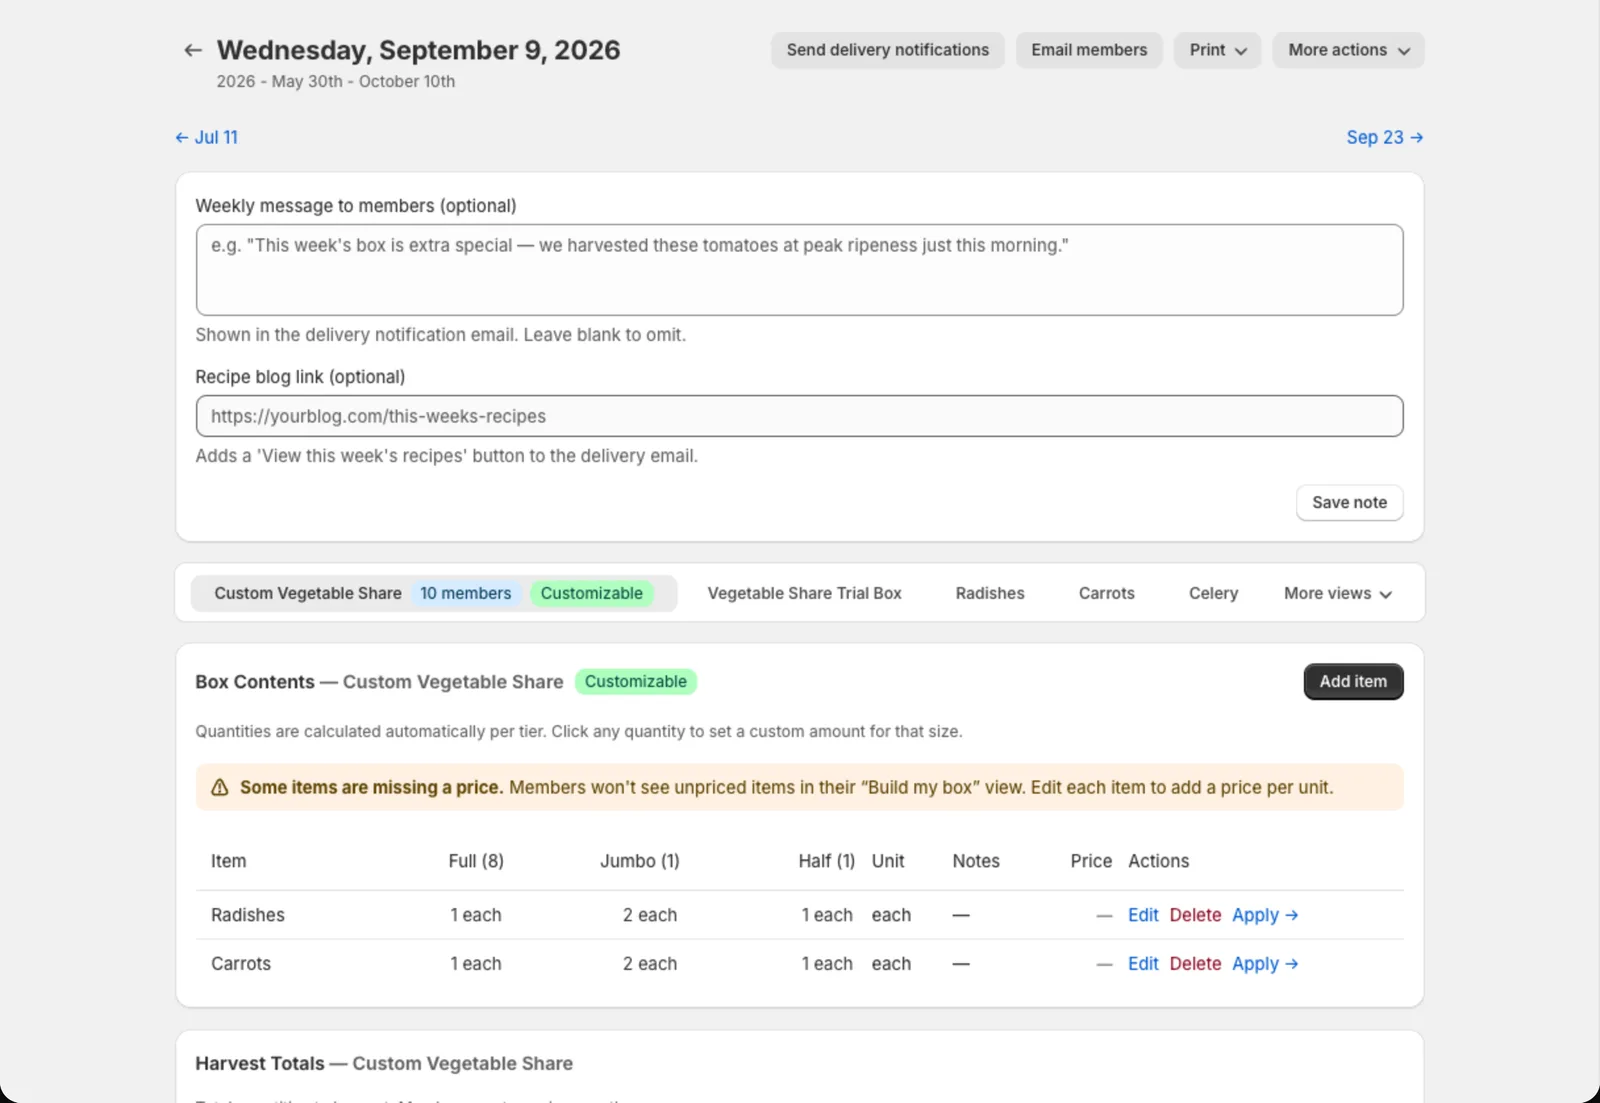
If you set a default box for the season, the date starts with those items. From there:
- Add item: pick a Shopify product (or just type a name), then set Qty per full share and the unit (lbs, bunches, each…).
- Copy from [last delivery]: start from last week’s box (under More actions).
- Import from collection: add a whole Shopify collection at once.
Copia fills in the quantity for each size using that size’s harvest multiplier. For example, a Half share with a 0.5 multiplier gets half of the full-share amount. To set an exact amount for one size, click its quantity and type it in.
Harvest totals at the bottom show how much of each item to pull from the field, with member counts in brackets. Delivery revenue shows what the day is worth.
Customizable boxes
If a share type has customizable boxes turned on, members can Build my box in the member portal by picking items from this delivery’s list. For each item, set:
- Price per unit: what the item counts for in the member’s box. Items without a price are hidden from members.
- Available quantity: how many units members can claim in total. Leave it blank for no limit.
- Category: groups items (Greens, Roots…) to make choosing easier. You can edit categories in Settings → Item categories.
Member item list
The Member item list on the Harvest Planning page is what members choose from in their portal. Each item has two checkboxes:
- Can swap: members can pick it for a swap, every week or for one delivery.
- Can exclude: members can pick it under Never include.
Click Add item to add one, and tick the checkboxes right in the list to change where it appears. Linking an item to a Shopify product tracks its inventory.
- Use the same names you use in your harvest plans. A swap or a Never include item only takes effect when the item is in that week’s plan. Each name can only be on the list once.
- Members can only pick items on this list. With no Can swap items they can’t add swaps, and with no Can exclude items the Never include section doesn’t appear.
- Hide takes an item off both lists without deleting it.
Who’s on this delivery
The member list for the date shows every box and its status: Charged, Pending, Skipped, On hold, Failed and so on. Use Add member to this delivery to add someone outside their normal schedule, like a member making up a missed week.
Messaging members about this delivery
- Send delivery notifications emails members their box contents, with an optional note and a link to a recipe blog.
- Email members sends a custom message to everyone with a box that day, like “Pickup is moving inside because of rain”. Untick anyone you want to leave out, and use Send test to me first.
Printing
Use Print → Pack list or Pack labels. See Pack lists and labels.